In OpenOffice.org 3.0 both Draw and Impress gain interactive cropping for pictures that resembles the WYSIWYG cropping found in Microsoft Office, the GIMP, and many other programs.
How to use interactive cropping
- Open a document in Draw or Impress.
- Click once on the image to select it. Notice the eight green handles.
- In the picture toolbar, click on the button Crop Picture.
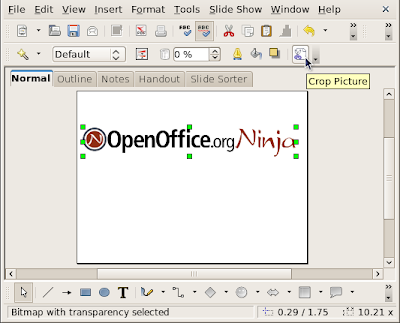
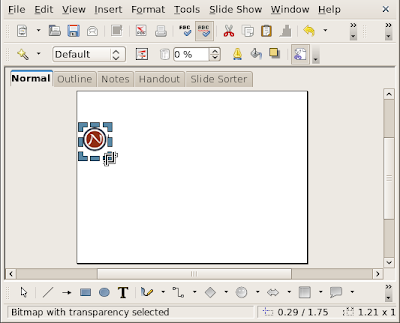
- Notice the green, square selection handles become blue handles with a different shape.
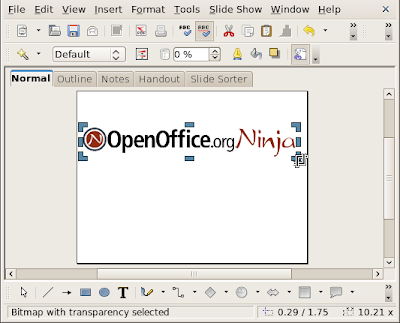
- Use the mouse to drag the handles to frame the image.


The cropping dialog
As an alternative to interactive cropping, the old cropping method via the dialog is still available. It works using either the keyboard or the mouse.

There are two ways to access the crop dialog:
- Single left click on the image to select it. Then, right click on the image. Then, choose Crop Picture.
- Single left click on the image to select it. Then, click on the Format menu. Then, choose Crop Picture.
Interactive cropping and cropping through the dialog both only work for bitmap images such as PNGs, JPEGs, GIFs, and BMPs, and cropping is not compatible with built-in shapes such as squares, circles, and stars.
Cropping in Writer
To crop an image in Writer:
- Copy the image from Writer and paste into a blank Draw document.
- Crop the image in Draw.
- Copy the image from Draw and paste back into the Writer document.
Non-destructive cropping
OpenOffice.org 3.0's cropping is non-destructive. That means after you close OpenOffice.org and reopen your document, you can change your mind and reverse the crop. In this sense, a more accurate icon would be a frame rather than scissors: the process is more precisely described as hiding than cutting.
Non-destructive cropping has both pros and cons. Non-destructive cropping is good for general use but unsuitable for high-security situations requiring permanent redaction. Also, the hidden area of the image still occupies disk space.
To make a crop permanent, either:
- Crop in an external graphics editor such as Photoshop or the GIMP before importing the image into OpenOffice.org.
- Export to the final document PDF for distribution.
- Use the Sun Presentation Minimizer and check the box Deleted cropped graphic areas.
Interactive cropping as an extension
OpenOffice.org 2.2 and later support CropOOo, an extension for interactive, quasi-destructive cropping. Solveig Haugland explains how to install and to use CropOOo.
CropOOo's cropping is permanent—to a point. If you unzip the ODF file, you can find the original uncropped graphic.
Comments
im using OOo calc 3.0